Building a DIY Flow Hood
Anyone following me on twitter may have noticed I posted a few pictures of my progress during my build of a simple HEPA filter based laminar flow box (not sure if it’s actually considered a flow hood). The idea of this build being to greatly improve the reliability of the aseptic protocols in our lab.
To come up with the design I did a lot of research and ended up finding some great resources on various psychedelic mushroom growing forums, a surprisingly good resource. The design that is popular and that I ended up going with (at least for mk I of the flow hood) is essentially just a box with a fan blowing in one side and the HEPA filter mounted on another side. While the construction side of things is therefore rather simple, the crucial aspect is actually achieving a laminar airflow by pairing a suitable fan with your chosen filter.
I found that this guide by EvilMushroom666 explained the maths of figuring out what fan to pair with what filter really well. In summary, you need to source a fan that is capable of blowing enough air for the size of your filter at the given amount of pressure drop (back pressure) that your filter creates.
So step 1 was to find a filter that was reasonably priced and would give a decently sized working area. Unfortunately for us Brits, it seems there are far more options in the US than in the UK for reasonably priced HEPA filters, however Jasun Filtration had the Ultima MPW78 18×24 for £100. Right. Filter sorted.
Step 2 was where the inimitable EvilMushroom666’s guide lead the way for me and helped me to arrive at the necessary specification of the fan I would have to find. It seems that most people have to resort to squirrel cage blower fans to achieve the kinds of airflow necessary despite the high pressure drop of HEPA filters. However, after several hours of looking through fans on mouser.co.uk I managed to a find a beastly 12V DC fan that could handle the pressure drop and still put out enough air for our filter at around a quarter of the price of the squirrel cage blowers.
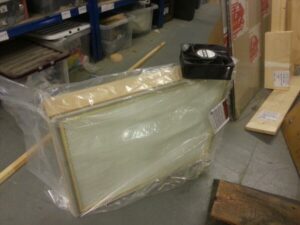
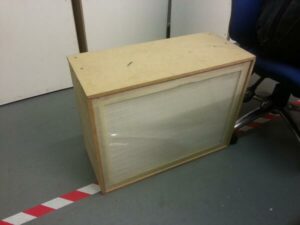
Now came the assembly, which was essentially just the building of a box. And though being located in a hackspace certainly helps with getting this done, this could all be done with very minimal tools should you not have access to a fully kitted out workshop. One thing to note was that my attempt to make the box airtight using the spare drain sealant lying around the hackspace didn’t actually work, however this was easily remedied with a bit of tape to seal all the box’s joints properly.
Finally, I attached a prefilter and we connected the fan to a power supply and overvolted it a tad to reach the required airflow. We tested to see if the air coming out of the filter was indeed laminar using a bit of liquid nitrogen and some water to produce a thick cloud of easily visible moist air.
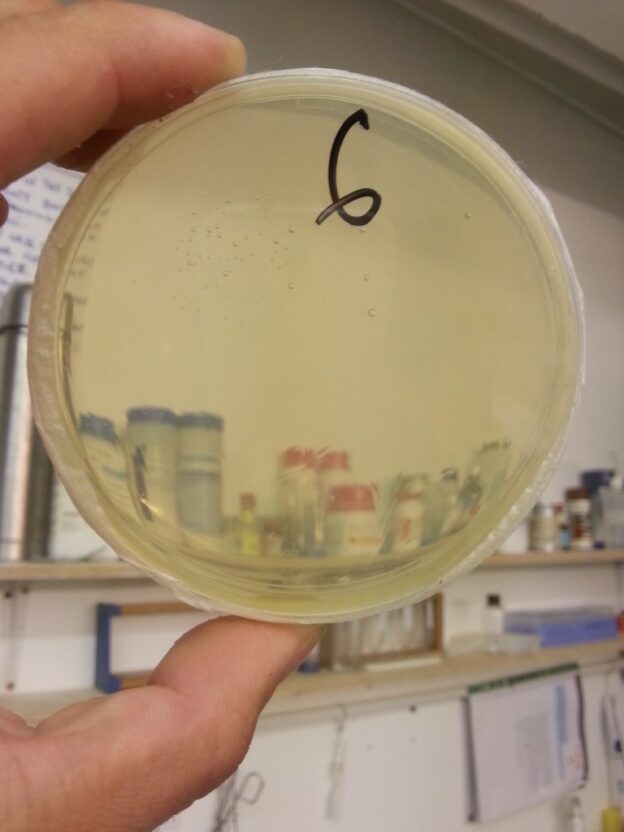
The final test was to carry out a dummy plating procedure where the LB agar plates were not inoculated with anything but then incubated for a few days. Our first attempt was somewhat disheartening as the plates that were prepared in the “sterile” zone did infact become contaminated (though less than the controls). For attempt 2 we created a raised shelf in front of the filter on which to work, and this lead to success.
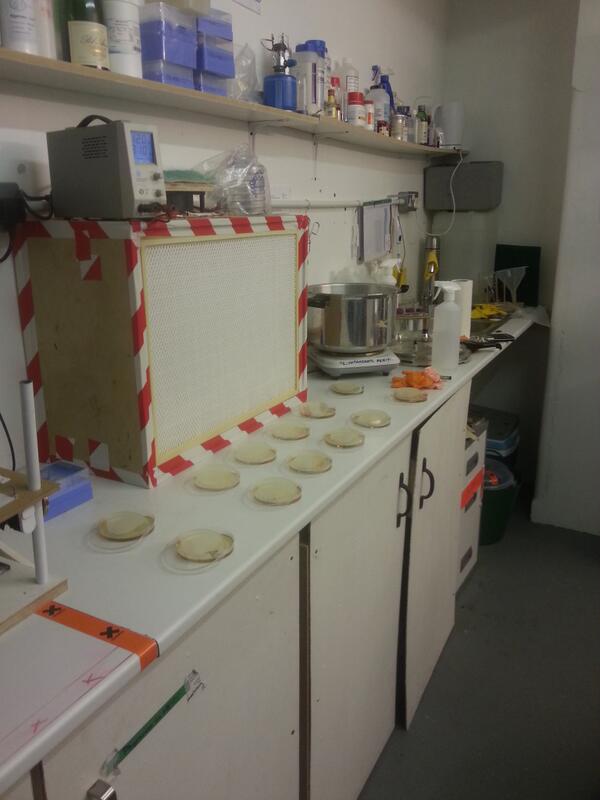
In this improved configuration, our controls, where the plating was done outside the clean airflow, were covered in a colourful mosaic of colonies. And, apart from the two plates that were furthest away from the filter at the corners of the clean work area, the rest of the plates were completely sterile.
Obviously, though this is an incredibly encouraging result, it has not quite proven that the “sterile” work area is indeed sterile. However since we would rather not waste time and petri dishes by doing further dedicated experiments to establish the effectiveness of the DIY flowhood, we have marked the 8 spaces in which petri dishes can be placed in the sterile area. Every time a plating protocol is carried out we shall record the what space it was carried out in and if/how many contaminant colonies grow on the plates. Over time we should build up a nice picture of the statistical likelihood of contamination based on the spatial position of within the sterile area.
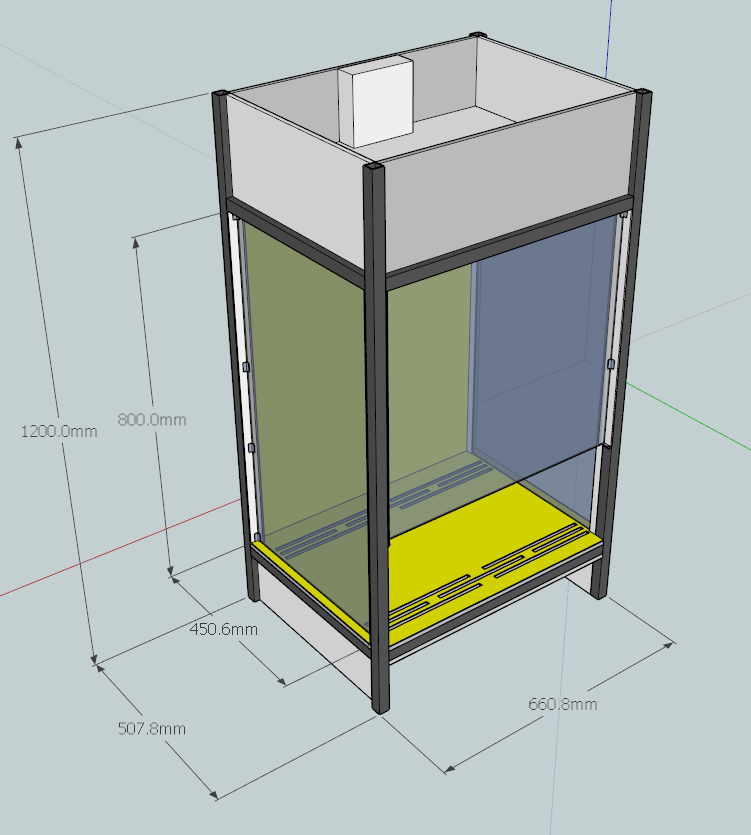
This is only the beginning however. I have as yet not found any examples of people constructing a vertical laminar flow cabinet, and as you can see from the wiki page for this project, that is the eventual aim of the DIY flow hood mk II).


Great build! It makes life so much easier to have one of these.
HEPA filters are often sold as replacement items for office air purifiers. I’ve got mine from Followed.
I constructed a big down flow for a bio printing workshop earlier this year. It had to be large enough to contain a custom agar printer. The design was derived from amateur orchid websites.
Here’s a picture http://farm6.static.flickr.com/5502/12366127263_fe4e07d2f9_m.jpg
Do you mean ‘Fellowes’ as the source of a HEPA filter? I actually came across their cheap air purifier replacement filters and thought they might work as a cheap alternative to HEPA filters manufactured specifically for flow hoods. However after tracking down the actual specifications for the Fellowes HEPA filter (Winix uses the same filters but puts their own brand on them) you can see that the pressure drop they create is MASSIVE and that they are only rated as HEPA upto a very slow air speed.
I decided that trying to use them in a laminar flow set up would be a waste of time since you would probably need some huge fan or an array of leafblowers to actually push enough air through them, and by that point the actual particle catching efficiency would probably not be as effective.
I am really interested to know how well your set up works. Does the vertical nature mean that you don’t need laminar flow?
That’s a subtle way of thkniing about it.
I really like your scientific approach to determining the sterile zones within the laminar flow. Please keep us updated on the dataset you collect.
Alverde este marca proprie a dm-ului si nu este cocitmealizara in alte magazine. O crema foarte buna si pe care poti sa o gasesti in Ploiesti este cea cu argila de la Ana Aslan.
Hi, will that fan definitely be powerful enough? And can I ask how you overvolt it? Many Thanks
I spent a lot of time searching for a cheap fan that would produce the required airflow for that filter. You can check the data sheet for the fan I linked to for yourself. Additionally, our setup works fantastically so the fan definitely does the job. To overvolt it to 13.8v you can buy a fixed 13.8v supply such as this: http://www.ukwholesale.info/tools-testing-equipment/switch-mode-5a-138v-bench-top-power-supply-650656.html
For true laminar flow you need the proper hepa filter not just any hepa filter and it has to be matched to the proper blower to acheive 100 cfm. Anything else is a waste of time and money.
You’re concerns are addressed in the post.
No they are not. That fan produces Less cfm than you need and has a static pressure cealing far inferior than what you need. Plus a fan that says 300cfm 150pa doesnt mean it makes 300cmf AT 150pa. This setup doesn’t work and honestly it is quite ridiculous. Stop lying to people and making them waste money.
I just wanted to say how much I liked your post. The links are super too. The explaination of how to determine how many CFM the blower will need to move was sooo easy to understand. I am thinking about building another laminar hood and would definately try your way.
thanks!
I’m thinking of following your example and building one of these.
Now you’ve had some time to use it is there anything you would do differently ?
Nice 3D model and thanks for sharing!
Like Sam I’m planning to build one inspired on yours too. Please, post more news about this project, so we can compare results. 🙂
Great writeup. followed the links and noticed that sadly the Ultima MPW78 18×24 has now increased in price 🙁
hello,
your working area is 800x45x660, after making this can you confirm that the blower you used is actually enough to get 100cf² out of the unit?
i need a setup like yours 100% but i have never thought that this little blower could deliver enough!
Yes, the fan does a good job. Make sure to run it at 13.8v however! Stay tuned though as I’m building a mark II model that is a bit more complicated but should give a better working area.
Looking forward to the 2nd version, will hold off buying supplies till then. Will it be so budget friendly?
Has the Mark II been completed as yet? Thanks for the great write up, I am seriously struggling to find a suitable HEPA, the link provided gives a 404 (Not found).
https://www.jfilters.com/i/UMPW78111824/ultima-mpw78-18×24
Nicht mit mir.Statt andere zu diskretieren, sollte man zuerst selber vorbildlich agieren. Das sehe ich bei den meisten der #Bgelgergato-Bgolgern nicht.
Thanks for answering my question above and links to the over-volter, much appreciated. I have purchased the one you suggested and set up my unit using exactly the same fan and filter.
After sealing the box and switching on, running to 13.8v there dosent seem to be any air flow at all from the front of the unit, I tried using a flame to test and nothing. Have you any suggestions?
Thanks in advance
Hi, interesting post! I work for cleanroom equipment manufacturer Connect 2 Cleanrooms and we would advise anyone producing a similar product to be careful what materials you use. Eg, using wood and adhesive tape could generate particles that could harm your clean environment. Just a helpful tip. For your mark II version, take a look at the HEPA filters on cleanroomshop.com http://www.cleanroomshop.com/category/39-fan-filter-units.aspx – may be worth a look to see if they are are better value than your current supply.
i’m curious whether an automotive blower fan would work well enough.
they are often much cheaper, sold as scrap
Hi and many thanks for this post. Finally found an inexpensive Fan through this!
I would be intersted in how you fixed the HEPA filter against the housing, any hints there?
Kind regards!
Just found out that there is even a cheaper fan model with the same pressure specs (doesnt have the pulse sensor wire) : http://www.mouser.de/search/ProductDetail.aspx?R=0virtualkey0virtualkey9GV1512H5011
I read about using vacuum cleaner as air blower, from http://www.instrustables.com and as well, combination of uv light to counter microbial contamination..yet to build one.♡
Sorry. http://Www.Instructables.com
Anyone going to point out the obvious?
You made a massive mistake my friend, your fan is hardly sufficient.
Your filter is 18×24=3ft squared x 100ft recommended flow = 300cfm
So your fan should put out 300cfm AT SUM OF FILTER AND PREFILTER STATIC PRESSURE.
You have no prefilter so let’s assume your filter has a static pressure of 1 water column or 250PA
This means you need a fan/blower that must put out at least/slightly more than 300 @ 250PA
It is recommended an extra 10-20% extra so a blower that delivers 330 to 360 cfm @ 250PA!
Your desktop fan does not deliver that in the slightest, It may put out 300cfm without any static pressure though.
If you have not had any contamination your insanely lucky.
Regards
Hello friend i was able to locate a proper hepa h13 filter here with a intital pressure drop of 250pa and a final pressure drop of 600pa, can you help me sizing the fan/blower how much cfm or m³/h i need before the filter to achieve 200 cfm after it? thank you!
The H13 18×24 UMPW78111824 HEPA filter has a pressure drop of 90 Pa. There is a pre-filter, of about 10 PA. With the higher 13.8V the fan datasheet says there should be +250 CFM (cubic feet per minute). So it’s short of the 360 but it’s a very good start and we’ve been able to manipulate plates and cultures aseptically in it.
Please can you advise on the fan you used and how you put it all together …the ready made ones are out of my budget
Thanks
Nick
[…] started with the components from Mark 1, including the calculations which we double checked and left […]
Rather than guessing and taking a chance with your experiments, why don’t you get an anemometer (eBay, Amazon, etc) for 20 euro/pounds/dollar and verify you get 0,5 meter per second airflow all over the filter and work area!
Then you can advise on techniques and equipment with proof in hand, not only hope and wishes!
An amateur scientist shouldn’t mean amateurish.
CFM is only half of the equation when selecting fans, the pressure curve is the deciding tool for laminar flow applications.
For a forest creature like myself (a 73 yr old bio guy and his chem prof wife living in a former cornfield) weight and size are a serious problem. Nobody to help move one, no place to set up, and no place to store that resultant rhinoceros. You did a pretty good job of addressing those problems, thx. Am going to try my hand at tree cloning. Should be fun.
Hey do you get any positive pressure from that kind of fan? Would be really nice to know.
I found another fan on same site:
https://www.mouser.co.il/datasheet/2/471/San_Ace_172SG51S_E-1287968.pdf
It’s $75, 24VDC, and have enough power for small to medium filter.
You also need 24VDC power supply (110V-240V, $15 on ebay).
If also may need Pulse Width Modulation(PWM) controller ($13 on Amazon)